Swagger is an Interface Description Language for describing RESTful APIs expressed using JSON. It allows you to create interactive, machine and human-readable API documentation. It helps you to visualize and interact with the API's resources without having any of the implementation logic in place. It is a web-based application.
Swagger documentation site
Go to the Swagger documentation site
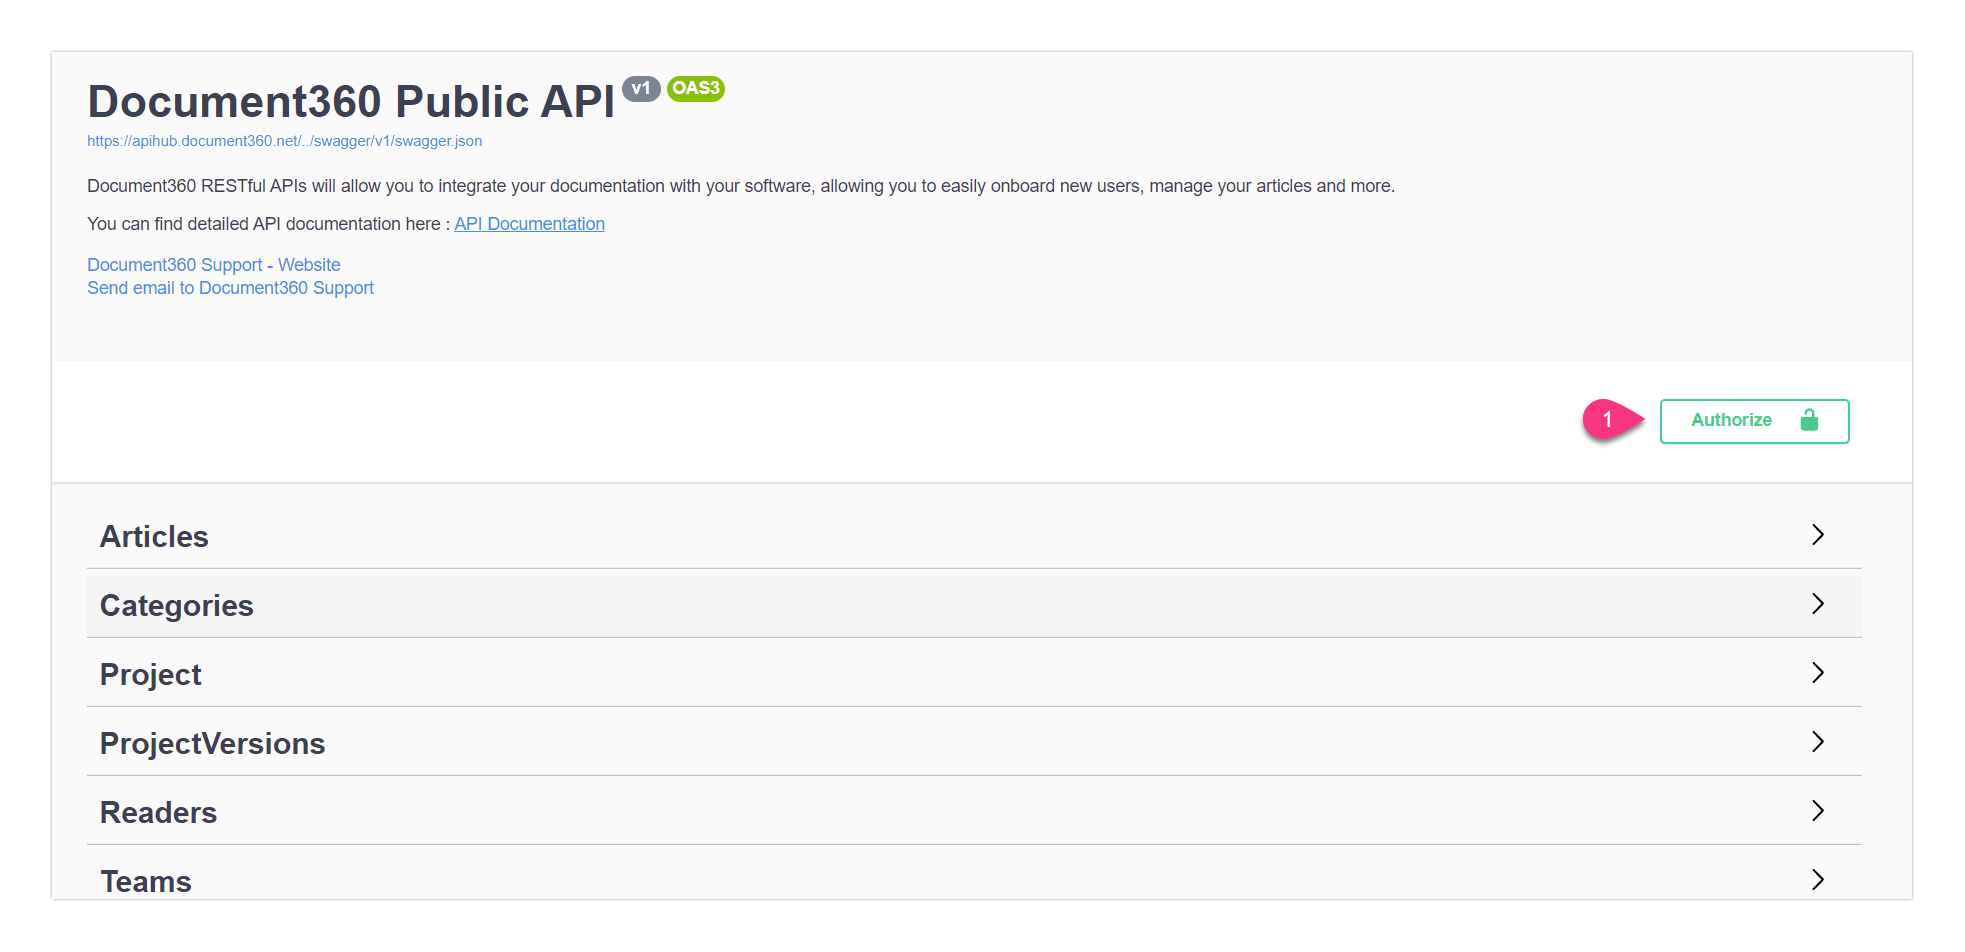
To authenticate the documentation:
Click on Authorize

Enter the API token in the Value field under api_token (apiKey)
Generating API tokens
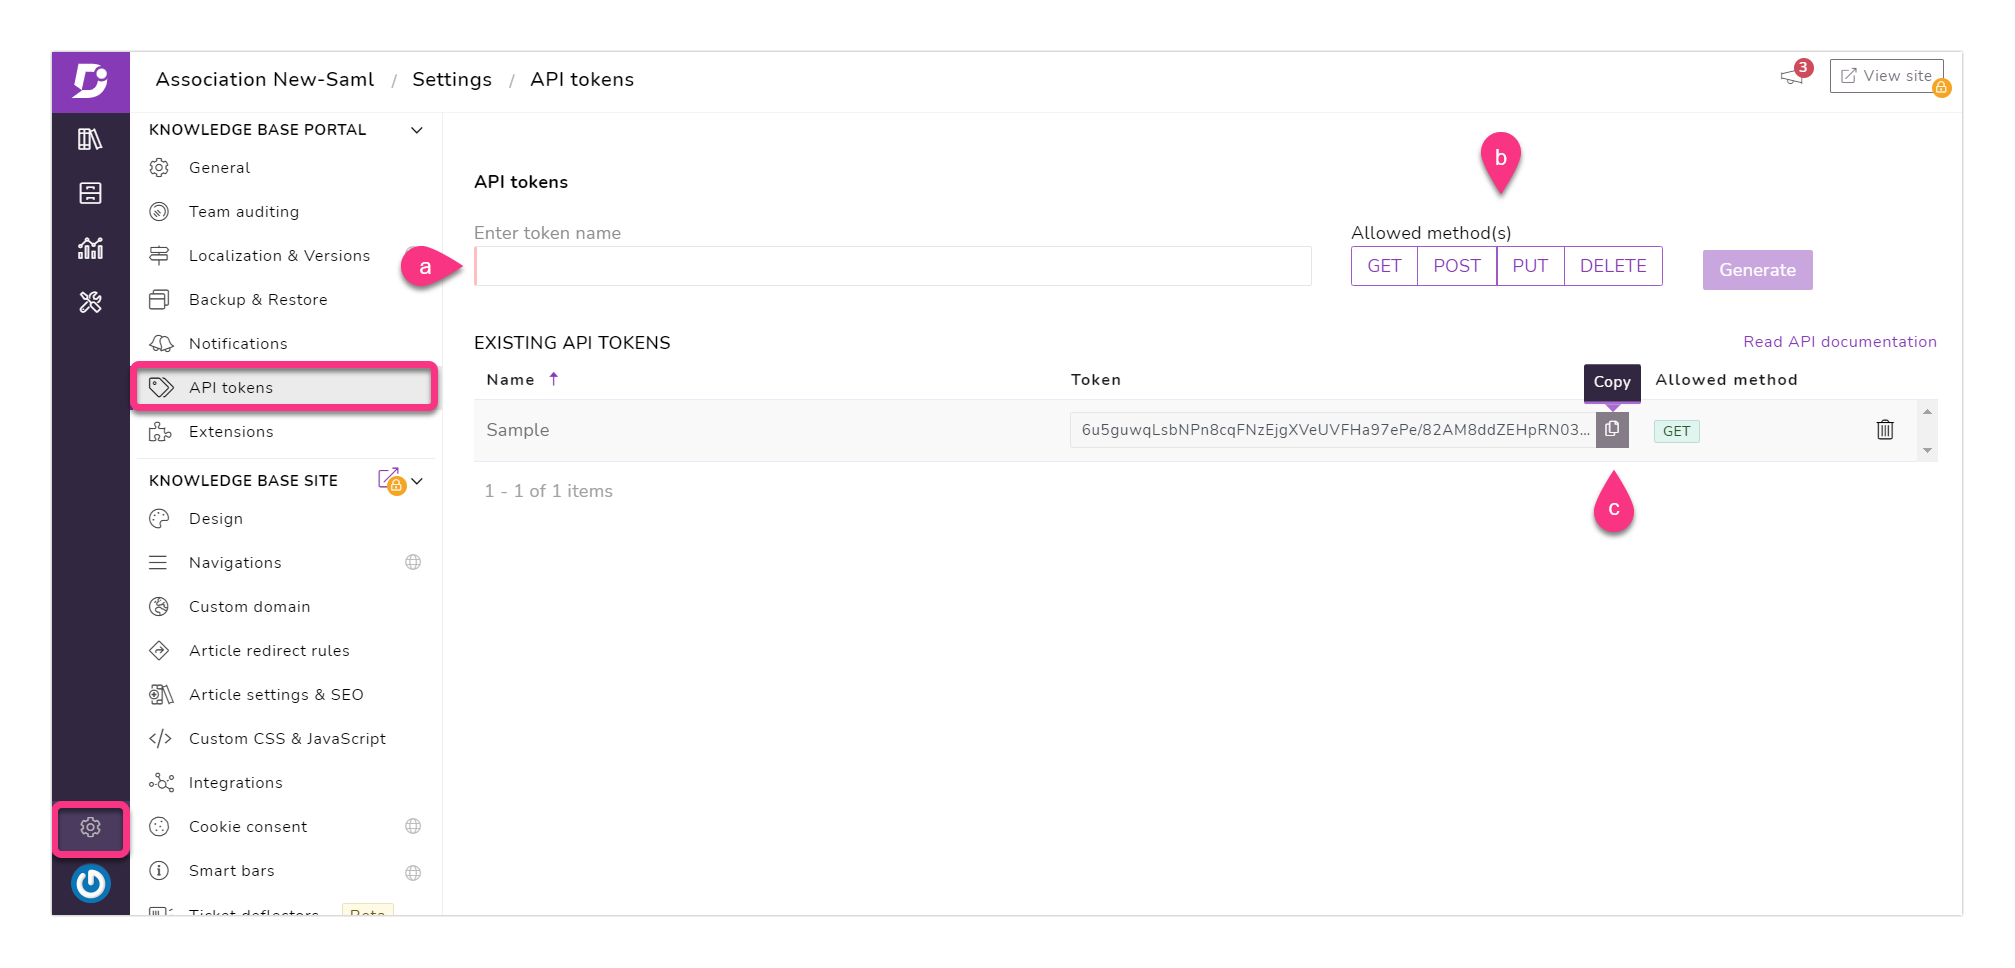
To generate the API tokens:
Go to Settings → API tokens
You can select the existing token or, you can generate a new token as per the requirements
To generate a new API token:
a. Type in a name for the API token in the Enter token name
b. Select the required HTTP method(s). You have four methods under Allowed method(s): GET, POST, PUT, and DELETE
→ You can only use the generated token for the selected method(s). It cannot be used to perform other methods
c. Click on the Copy icon to copy the API token
Click on the Authorize button
Click on Close. The authentication is successful
If you want to change to a different token, click Authenticate → Logout. Enter your API token → Authorize → Close
If you refresh the page, the session might end and, you would have to authenticate again. You can follow the above steps for authentication.
You can access the documentation by clicking on the required requests.
Refer to the Requests article for detailed information on the GET, POST, PUT, and DELETE.
You must use underscore wherever required.
For example, use underscore for "email_id" instead of "email id". If you use space, you would get an error.
Required fields
It is mandatory to enter the content in the field denoted with *required.
GET
In general, you can retrieve the information using GET.
Below is an example for GET action: To retrieve the information about the team account.
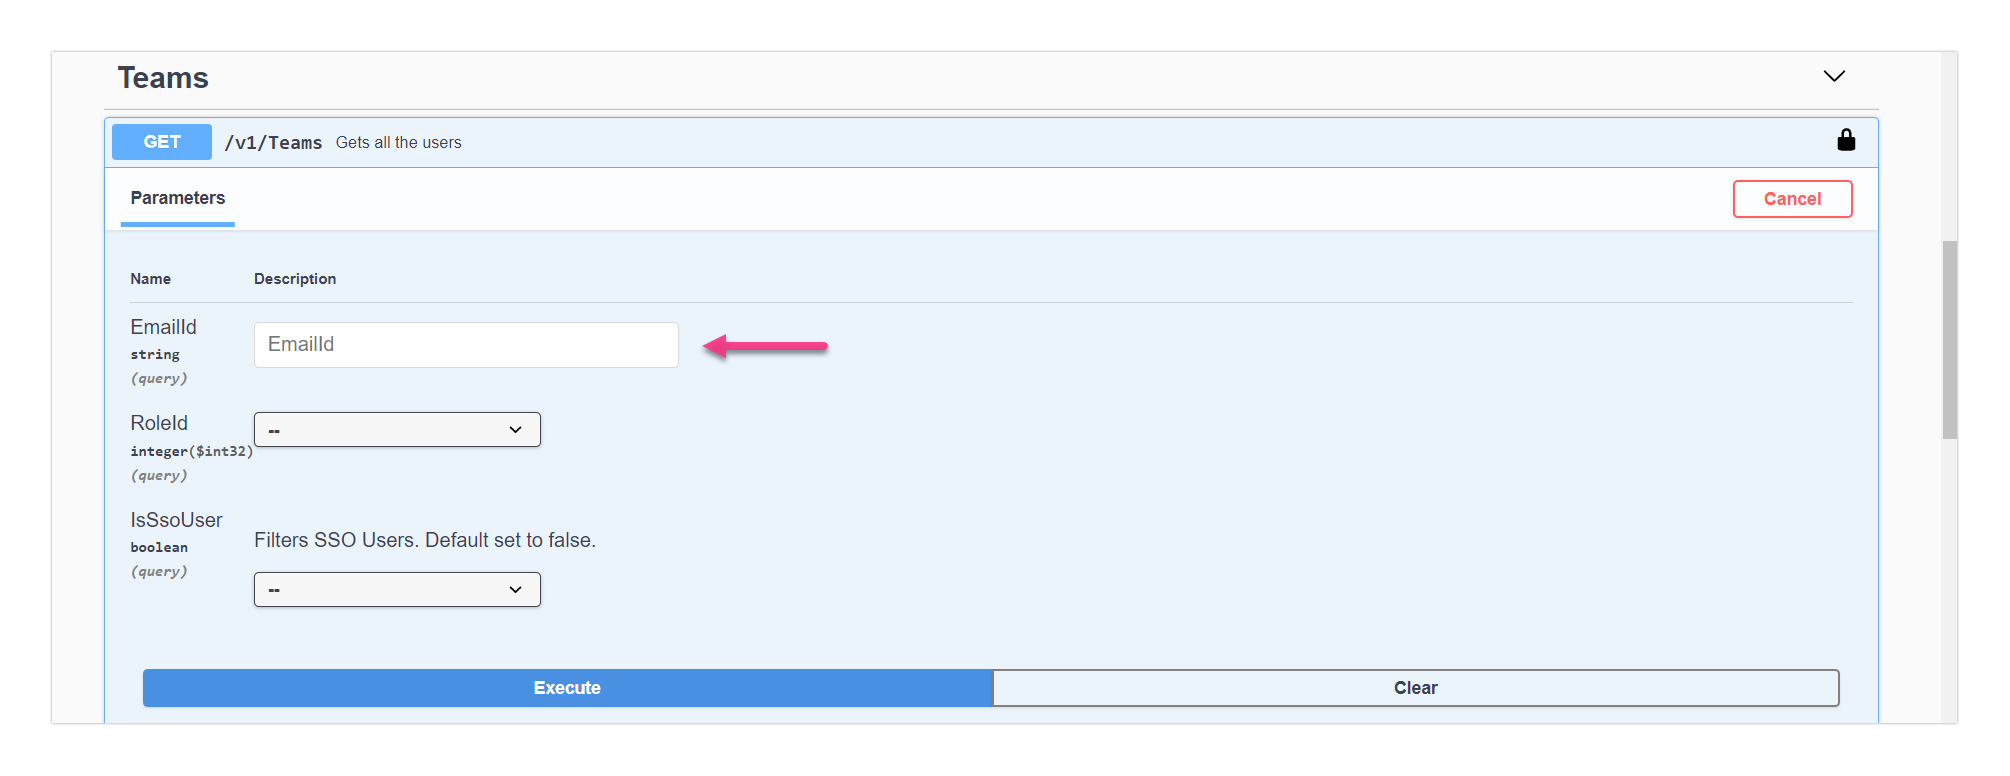
You can enter the email in the marked field to find the team account information
Click on the Execute button

The information about the team account would be available under the Response body.
POST
In general, you can add something using POST.
Below is an example for POST action: To add a team account to a project.

You should add the team account information such as email id, user role, and user id to add a user to the project
Required fields
For the mandatory parameters to be added, refer to https://apidocs.document360.com/docs/add-a-user
The team account would be added to the project
Click on the Execute button
If the status is 200 and success is true, the addition of the team account is successful
PUT
In general, you can update something using PUT.
Below is an example for PUT action: To update a user role in the project.

a. You should enter the user id in the marked field
b. Update the user role with the number mentioned for user role syntax. The number for the respective roles are as follow:
1 → Administrator
2 → Editor
3 → Draft Writer
4 → Reader
7 → Owner
c. Click on the Execute button
d. If the status is 200 and success is true, the update of the user is successful
DELETE
In general, you can delete something using DELETE.
Below is an example for the DELETE action: To delete a user id.
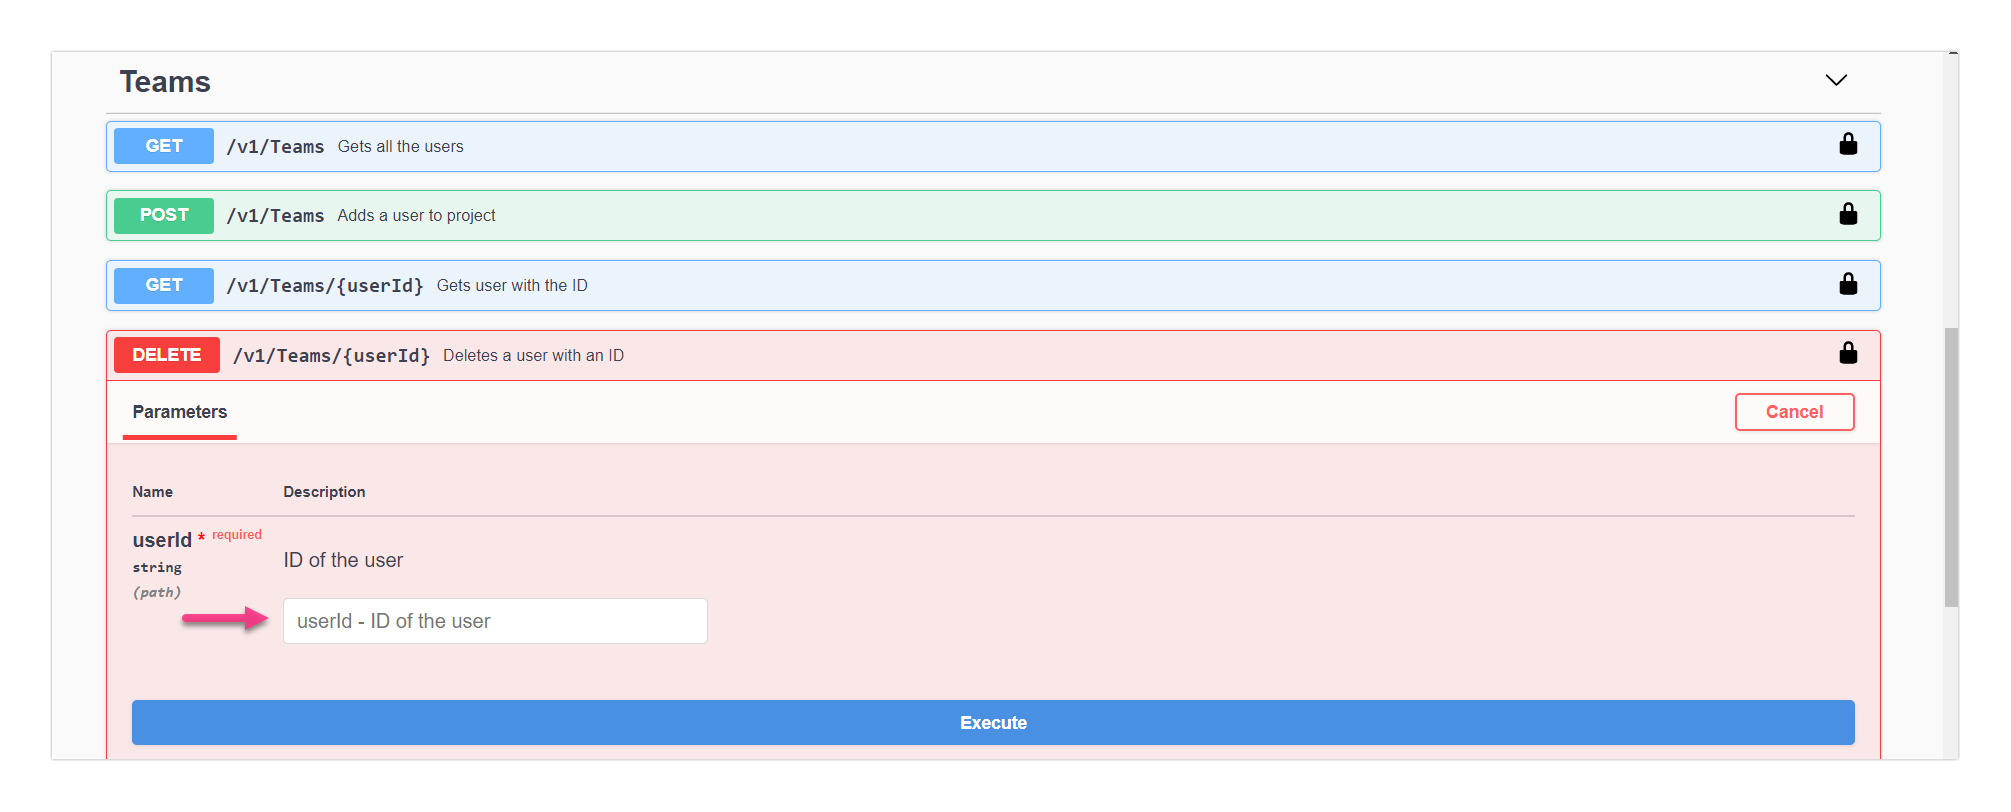
Enter the user ID in the marked field
Click on the Execute button
If the status is 200 and success is true, the deletion of the user id is successful
Related Blogs
1. Ultimate guide to create an API documentation with examples