You can use Document360’s API to create and publish multiple articles in one go. This helps you automate content creation across different versions and categories, reducing manual effort.
For example, you can create two articles in a category under version v1, and three articles in another category under version v2, all in a single request.
Prerequisites for creating multiple articles
Before you create multiple articles, complete the following authorization steps in Postman.
Authorization
To authorize requests in Postman, make sure your API token is added and the appropriate Base URL is set.
Click Document360 Customer API in the category tree.
In the Postman Workbench, go to the Variables tab.
In the Variables tab, check the Initial and Current values of the
baseUrlvariable.This value should already be set to
https://apihub.document360.io. If not, update both fields accordingly.Add a new variable for your API token. For example, name it
api_token.Paste your API token from Document360 into both the Initial value and Current value fields.
Go to the Authorization tab and enter the variable you created in the Value field.
For example, enter
{{api_token}}if your variable is namedapi_token.
Once you've completed these steps, you're ready to start using Document360 APIs in Postman.
Creating multiple articles using Document360’s API
To create multiple articles, you need the following values:
Project version ID
Category ID
User ID
Get project version ID
To create an article using the API, you need to associate it with the correct version of your documentation project. This step helps you retrieve that version ID.
In Postman, under Document360 Customer API, expand v2 > Project Versions.
Click Gets list of project versions, then click Send.
In the response body (as shown in the screenshot), locate the
idof the version you want to use.NOTE
If you're unsure which one to choose, look for the version marked with
"is_current": true.Copy the
idvalue and save it for later use.
NOTE
In Document360, the order of categories and articles is based on the paths defined in the API specification files rather than tags. The first tag in the path determines the first category, with all endpoints mapped to that tag grouped accordingly.
Get category ID
To create an article, you need the ID of the category where the article should be added. Follow these steps to retrieve it using Postman:
Under Project Versions, expand the relevant {projectVersionId}, then go to categories > Gets list of categories within project version.
Click Gets list of categories within project version, then switch to the Params tab.
In the Path Variables section, enter the project version ID you copied in step 4 of the previous section.
In the Query Params section, provide the following values:
excludeArticles→truelangCode→enincludeCategoryDescription→false
Click Send.
In the response body, locate the
idvalue of the category you want to use.Copy the
idand save it for later use.
PRO TIP
If you're not sure which category to use, look for the
"name"field in the response to identify familiar category names (e.g.,"Getting started").
Get user ID
To create an article using the API, you also need to provide the user ID of the team member creating the article.
In Postman, under v2, expand Teams, then click Get all team accounts.
Click Send to retrieve the list of all team members in the project.
In the response body, locate the desired user and copy the
idvalue.
PRO TIP
If you're not sure which user to pick, look at fields like
"email_id","portal_role", or"last_name"to identify the appropriate account.
Create multiple articles
Once you have the required values (project_version_id, category_id, user_id), follow these steps to create multiple articles using the API.
Steps to create articles
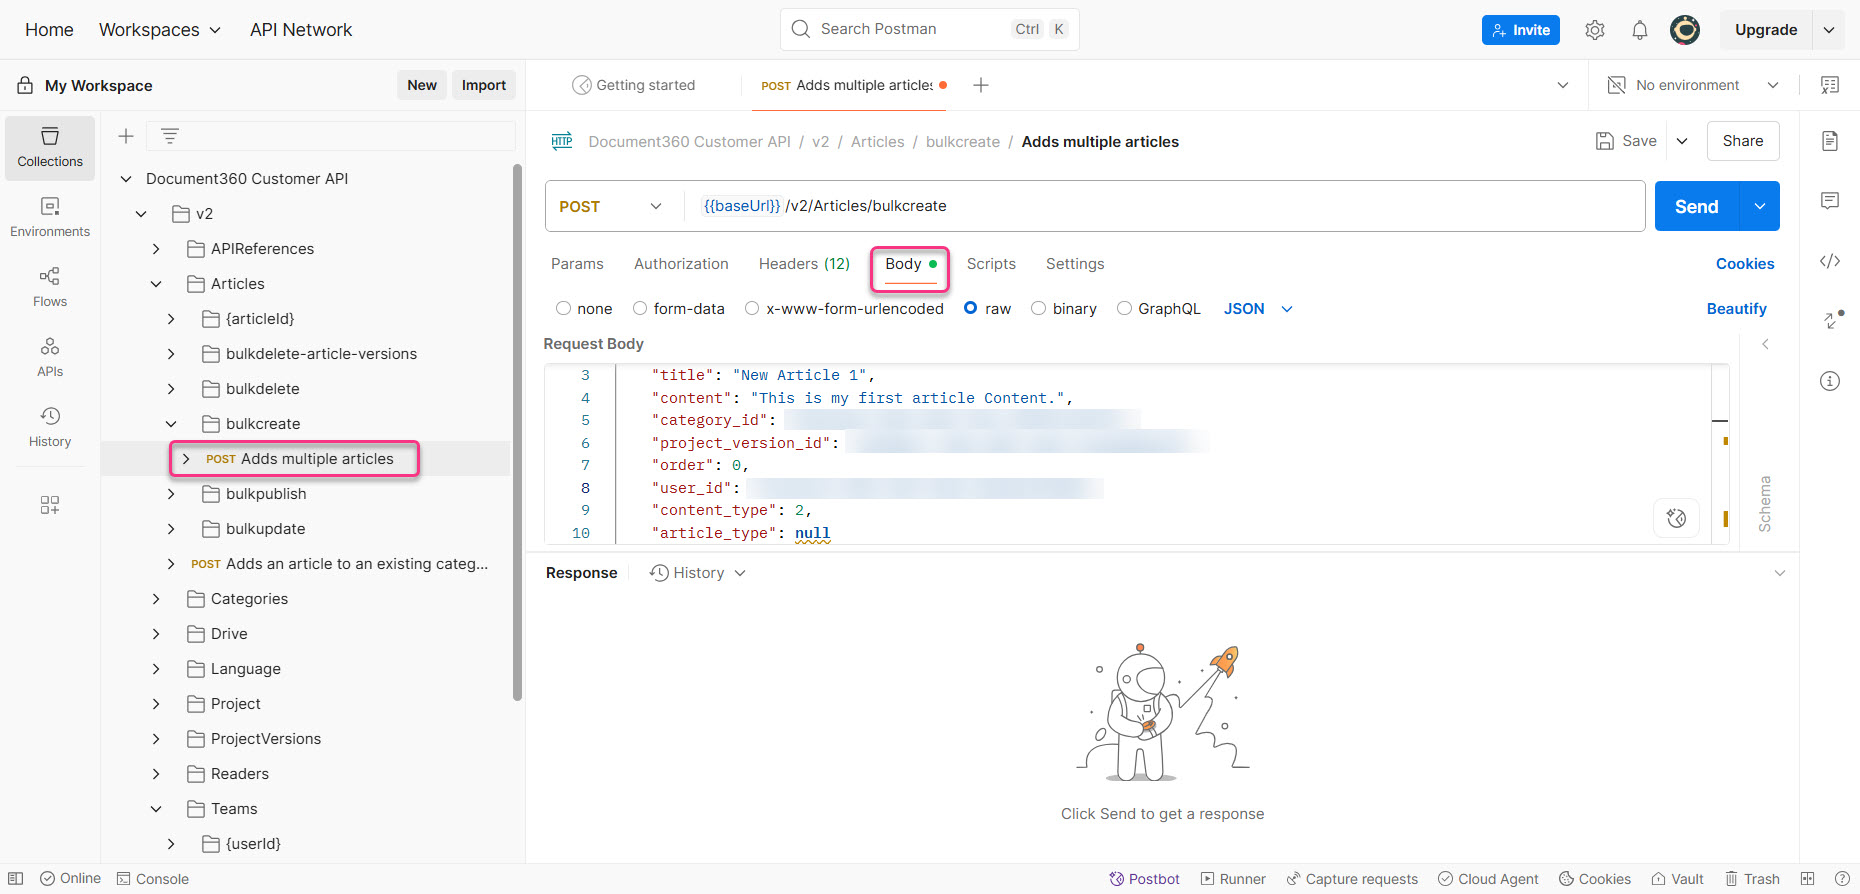
Under v2, expand Articles > bulkcreate, then click Adds multiple articles.
In the main panel, switch to the Body tab.
You’ll see a default JSON body with two sample article objects. To add more articles:
Copy one of the existing article objects (enclosed in
{}).Paste it before the closing bracket
].Add a comma
,after each object, except the last one.
For each article object, update the following fields:
category_id: Paste the ID of the category where the article should be added.project_version_id: Paste the project version ID.title: Enter the article title.user_id: Paste the user ID.content: Add the article content.order: Specify the position of the article within the category.For example:
To place the article first in the category, set
orderto0.To make it the fifth article, set
orderto4.
content_type: Select the editor type for the article. The default value of the parameter isnull.Set
content_typeto0for Markdown editor.Set
content_typeto1for WYSIWYG editor.Set
content_typeto2for Advanced WYSIWYG editor.
Click Send.
If the articles are created successfully, you’ll receive a
200 OKstatus and"success": truein the response.Copy the
idvalues for each newly created article and save them. You will need them for publishing.
Publish multiple articles
After creating your articles, you can publish them all at once using the API.
To publish multiple articles, you’ll need:
article_id: The ID of each article to publish.user_id: The ID of the user performing the action.
Steps to publish articles
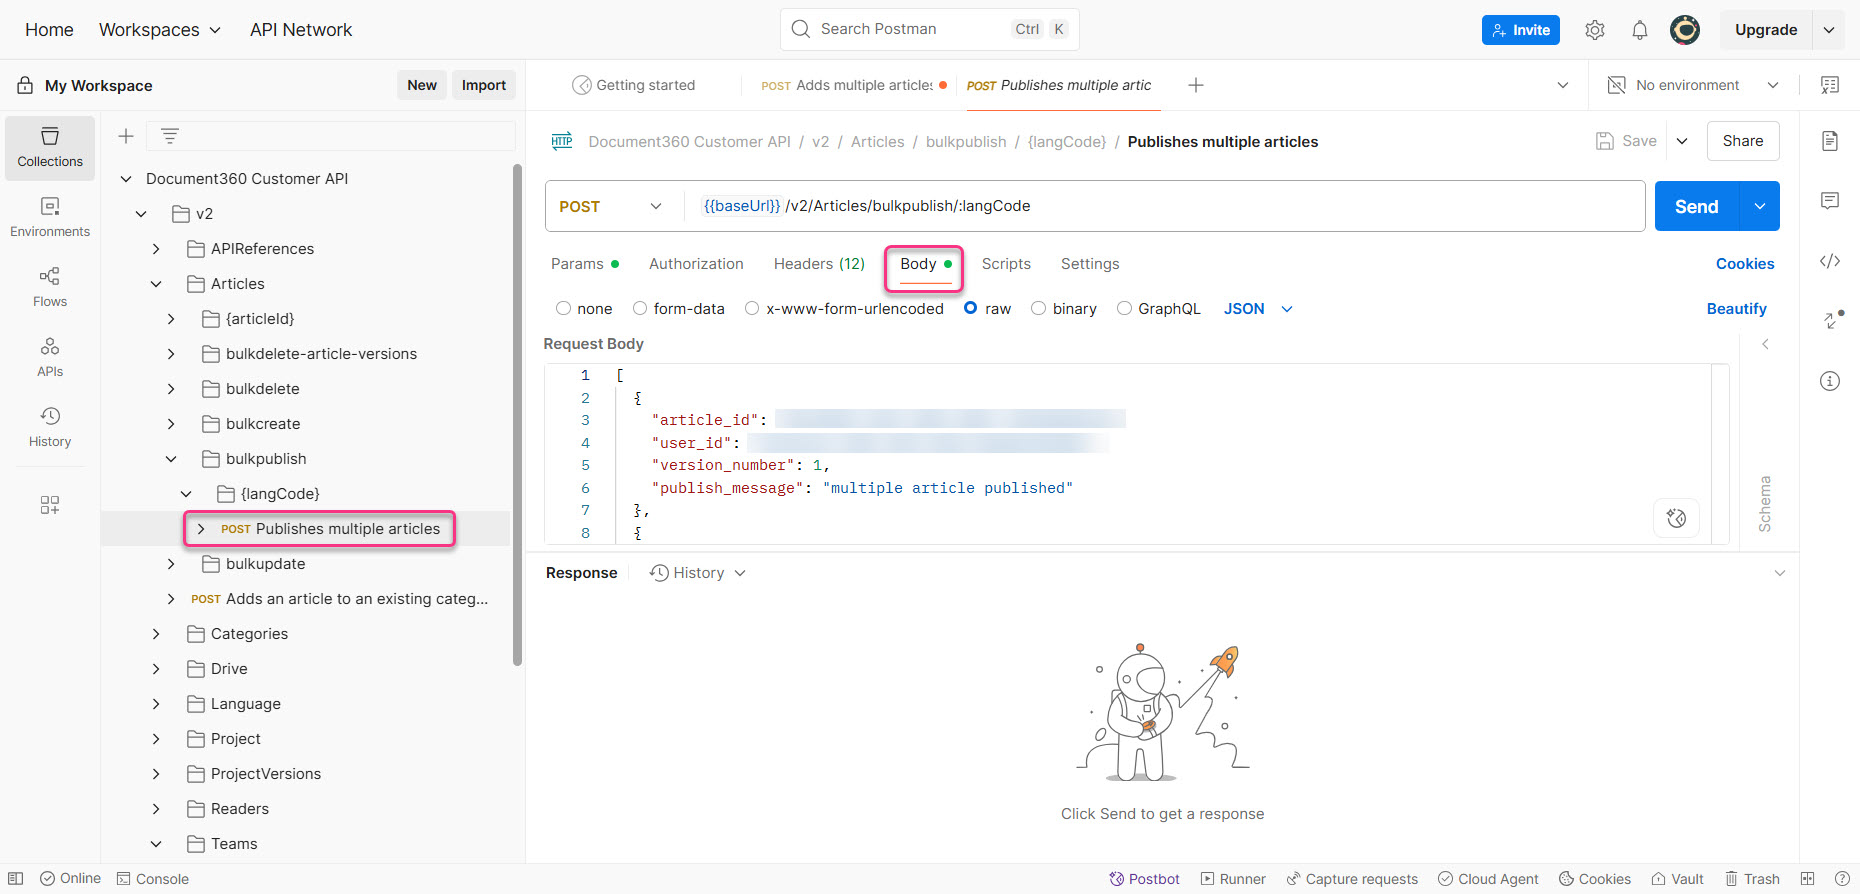
Under v2, expand Articles > bulkpublish > {langCode}, then click Publishes multiple articles.
Under v2, expand Articles, then click Publishes multiple articles.
In the main panel, switch to the Body tab.
You’ll see a sample request body with two article objects. To publish more articles:
Copy one of the existing objects (enclosed in
{}).Paste it before the closing bracket
].Add a comma
,after each object, except the last one.
For each article object, update the following fields:
article_id: Paste the ID of the article to publish.user_id: Paste the user ID.version_number: Specify the version number to be published.publish_message: Enter a short message describing the purpose of the publish action.
Click Send.
If the articles are published successfully, you’ll receive a
200 OKstatus and"success": truein the response.
NOTE
Each article publish request must be inside
{}and part of the array[]. Ensure all commas are in place and that the JSON is valid.